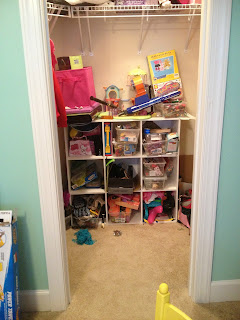
I did it! I moved the closet door! Now, instead of opening into the closet and taking up all of the space with the door swing, the door opens out, into the room! I just found 9 squart feet of closet space that we either couldn't use or couldn't get to before! This is the best feeling. Finally, I can actually use this closet to put Ms. Princess' stuff in.
I talked about how the different ways I could accomplish this task in my last post and ended up deciding to move the hinges. I started by dry fitting the door in the outer frame. The door fit even without notching out for the hinges. I put 2 boards under the door so it would sit at the proper height.
Dry fitting door (I used boards under the door to get it to the proper height):
Next I had Alex help me open the door, keeping the boards under for the correct height, and figure out where to screw in the hinges.
I started with the center hinge.

Then we attached to the door and closed the door, checked to see if it fit. The first time I did this, I had to move the screws in the center hinge over about 1/4 inch. I'm glad I only did 1 hinge at this point. The second time worked though. I did the same with the top and bottom hinge and closed and opened the door making sure they were in the proper place.
OK, time to notch out the hinges. Since I had just screwed them on, I was able to trace around each hinge and score with the utility knife. Then I got out the chisel and hammer and made this mess:
I don't own a router and even if I did I don't know how easy they are to use. So, I went out and bought an early Valentines gift, Dremel 3000.
I spent several hours just reading the directions and trying to figure out what all of the attachements that came with the Dremel were for. Then I realized it didn't come with a router bit. So I decided to give this a try:
After a LOT of noise, smelling smoke, and wrestling with the Dremel I realize that this tool is going to take some practice. But I did get the hinges in. I'll show you a pic but its not pretty.
The important thing is that the door works! It opens and closes and I just hope that no one ever stares at these hinges.
The last part was to make the hole for the latch. I looked through the drill bits (?) to find the right size for the hole.
Then I opened and closed the door a few times to get a mark on the frame to determine where the hole needed to go.
This part, I can honestly say, was easy. And it works great! I screwed in the latch plate over the hole (and don't have a picture of this). I didn't notch out the latch plate because the door is opening and closing fine without it and there is no need to make another big mess in the frame.
My last task I finished this weekend. Reattaching the moulding that I pulled off, filling in the old hinge recesses with wood putty, caulking and painting.
I finally finished this past weekend and all I can say is that its DONE. I'm not too happy with my filling in the hinge holes and the moulding is all beat up (I'll have to add a pic here) from where I pried it off in the last post. But its really not too visible, unless you look for it.
I used an off-brand of caulk and have to say that it didn't seem to be as smooth and easy to work with than and name brand I normally buy at HD. Disappointing.
I have to say that although this project isn't overall 'pretty' I learned a ton, almost enough to discourage me from attempting more projects in the future. But I'm not going to do that. I'm going to continue on because I enjoy these projects and its an education. Can't beat that.


