Well, I can say that this project is d-o-n-e done and looks pretty good but it was pretty tough going and took me way longer than it should have due to procrastination and frustration. In the end I had to admit I needed help and my husband Alex came to my rescue.
So, I left off in my last post with all of the Billys put together and sitting on a platform that we built to raise them up over the moulding and make them feel built-in.

We hauled some extra floor moulding we had in the garage up to the loft only to find out that 1) I raised the Billys so high that the floor moulding would not completely cover the bottom of the shelf and 2) my old fashined hand saw mitre box was way too short to cut the floor moulding anyway. Onto plan B and many, many trips back and forth to Home Depot.

I wandered the moulding aisle trying to figure out what to buy. They didn't sell 8" floor moulding so I bought some preprimed mdf boards (I can't remember the width, maybe 5 or 6 inches?). Since I couldn't use my short mitre box to cut it I used the next best thing I had, my jigsaw, and made some semistraight cuts. I was getting a bit frusturated at this point so I figured my semistraight cuts would just have to be corrected with caulk, sanding and woodfiller. I also used my jigsaw to cut a cope edge. This came out better than I anticipated so I was very proud of myself with this btw. I was almost done with cutting the 3 pieces I needed (front and 2 sides) when I accidentally cut through my jigsaw's cord. Uh oh.
Insert much you-tube watching along with more trips to Home Depot to get necessary stuff to fix cord.
OK, moving on. I found a piece of moulding to go on top of the mdf that would fill the gap on the bottom of the shelves.

So now the bottom of the shelves were covered. Next, I got some thin moulding to cover up the sides of the book shelves and the gaps where 2 shelves meet. Of course the first time I bought this moulding it wasn't wide enough to cover the seam, I got the right size on my second trip.

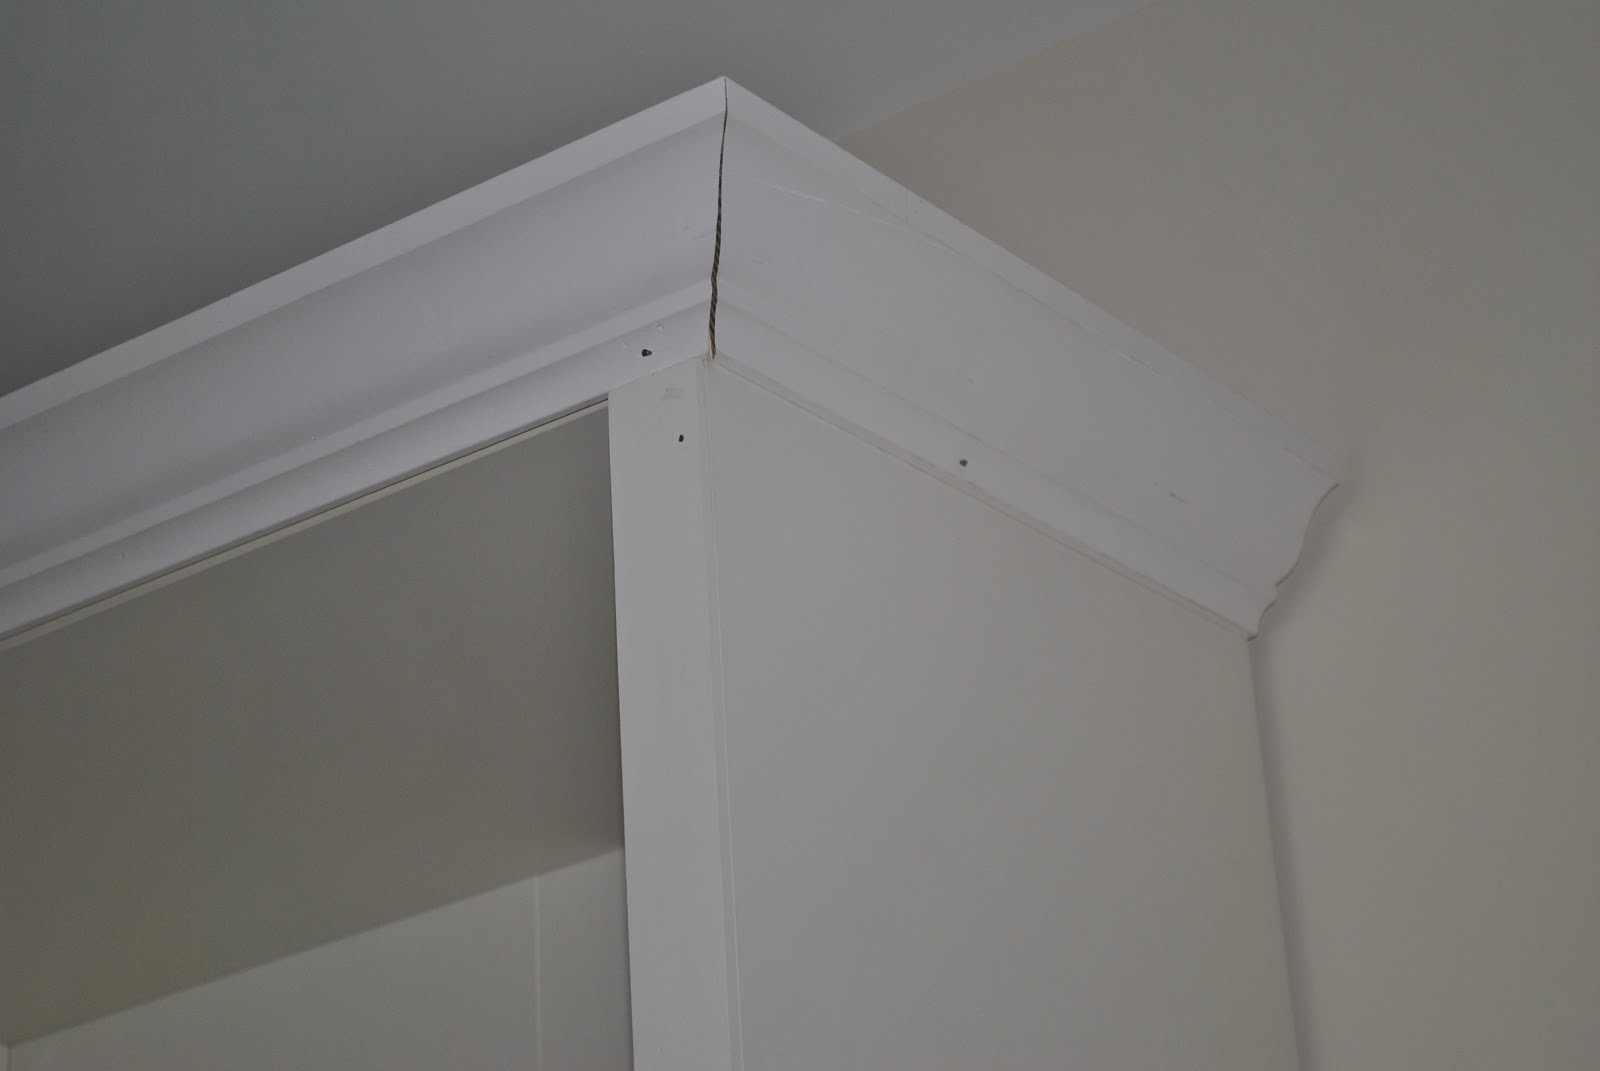
For the top I picked up some wide crown moulding. I had no idea on how cut crown so it was back to You Tube for instruction (I am so grateful for the awesome people who create instructional You Tube videos). Of course I realized that I needed a special clamp that I didn't have in order to cut the crown (another HD trip) but I was able to cut the crown and match up the corners fairly well. I'm not pointing out where I had to piece a straight section together, its not very pretty but most people won't notice. :)

Almost done......caulk, sand, paint the trim. Paint the back of the shelves and stick the shelves in. I debated about painting the back of the shelves and what color to use because I am sKeeeered of color. But, it is just a small area that I can repaint if I want to so I used the paint left over from daughter #1's room. A really pretty turquoise. Nice and bright.
So, here is a "before" picture (as before as I can find):

And here is an almost-completed pic, I haven't finished loading up the shelves but the TV is connected.


And the best thing I can say about this project is that it is done, aside from adding decorative things to hide the cords of course. Really, this project wasn't hard but it took me forever and at times I seemed to have lost my DIY mojo. Hate it when that happens.
Thanks for stopping by!!
-----Adrienne

What a fantastic IKEA hack! Very ingenious. As a person who loves color, I'm so glad you added the blue to the back. It's stunning. Congratulations, Job Well Done!
ReplyDeleteThank you!!
DeleteI love it. It looks great. And I also love the floor - way better than the old grey blue whatever color carpet!
ReplyDeleteGermans love your projects! ;)
the moulding turned out great and love the pop of color on the back!
ReplyDeleteThanks for much for linking up to support Habitat! Good luck and hope to see you back next Thursday night. :)